
Abstract
MRI fusion transperineal prostate biopsy is becoming more utilized because of its increased detection of clinically significant prostate cancer and decreased risk of sepsis. We present a video guide to properly perform this prostate biopsy technique using the Philips UroNav MRI fusion software. The MRI fusion transperineal prostate biopsy requires an ultrasound machine and transrectal ultrasound probe, MRI fusion machine, and a complete compliment of operating room supplies and staff. Local anesthesia is injected in the perineal subcutaneous tissue, prostate capsule apex, and prostate base near the seminal vesicles. Biopsy is performed through the grid plate and specimens are directly placed in formalin jars. The multitude of equipment and interfaces required by this procedure results in common problems in the setup, segmentation, and biopsy technique, which are addressed in the troubleshooting section.
Featured Video
https://stream.cadmore.media/player/c42038e6-a151-4966-bacc-ce00e7e4081d

Indications
Increasing randomized control trial data is showing that MRI fusion prostate biopsy increases the detection of clinically significant prostate cancer while minimizing diagnosis of clinically insignificant cancer. Although MRI fusion prostate biopsy has not become the standard of care, multiparametric prostate MRI has become well integrated into many risk nomograms and active surveillance protocols. The transrectal prostate biopsy technique was widely adopted with the invention of the transrectal ultrasound probe, but carries an ∼1% to 3% risk of postbiopsy sepsis with increasing prevalence of multidrug resistant organisms. The transperineal approach is becoming increasingly adopted to avoid this infectious risk and to more precisely target anterior lesions. The MRI fusion transperineal prostate biopsy combines the advantages of these two techniques.
Preoperative Preparation
The transrectal ultrasound probe should first be prepared within its probe cover. This begins by attaching a Luer lock syringe with water to the probe cover. A TUMI syringe is filled with ultrasound gel, which is then used to slightly lubricate the entrance of the probe cover. The ultrasound probe is inserted into the probe cover upside down and with the probe tip angled toward the ground so that air collects on the opposite side of the transducer. The probe cover is inflated with water from the Luer lock syringe, and air is aspirated with the probe tip angled toward the ground to degas the probe cover. Physically tapping the air bubbles can also facilitate air bubble release.
The stepper holds the transrectal ultrasound probe and grid plate. The probe is loaded into the stepper, with special attention that the metal pin and water tubing on the lateral aspects slide into their respective grooves. The probe is screwed into place once it is in the correct position.
The back table setup includes sterile gloves, blue towels, biopsy gun, grid plate, 1% lidocaine with a 25 gauge needle for subcutaneous injection, 18 gauge spinal or 25 gauge Chiba needle for the seminal vesicle injection, cup of betadine, bowel of sterile water, and tegaderm dressing.
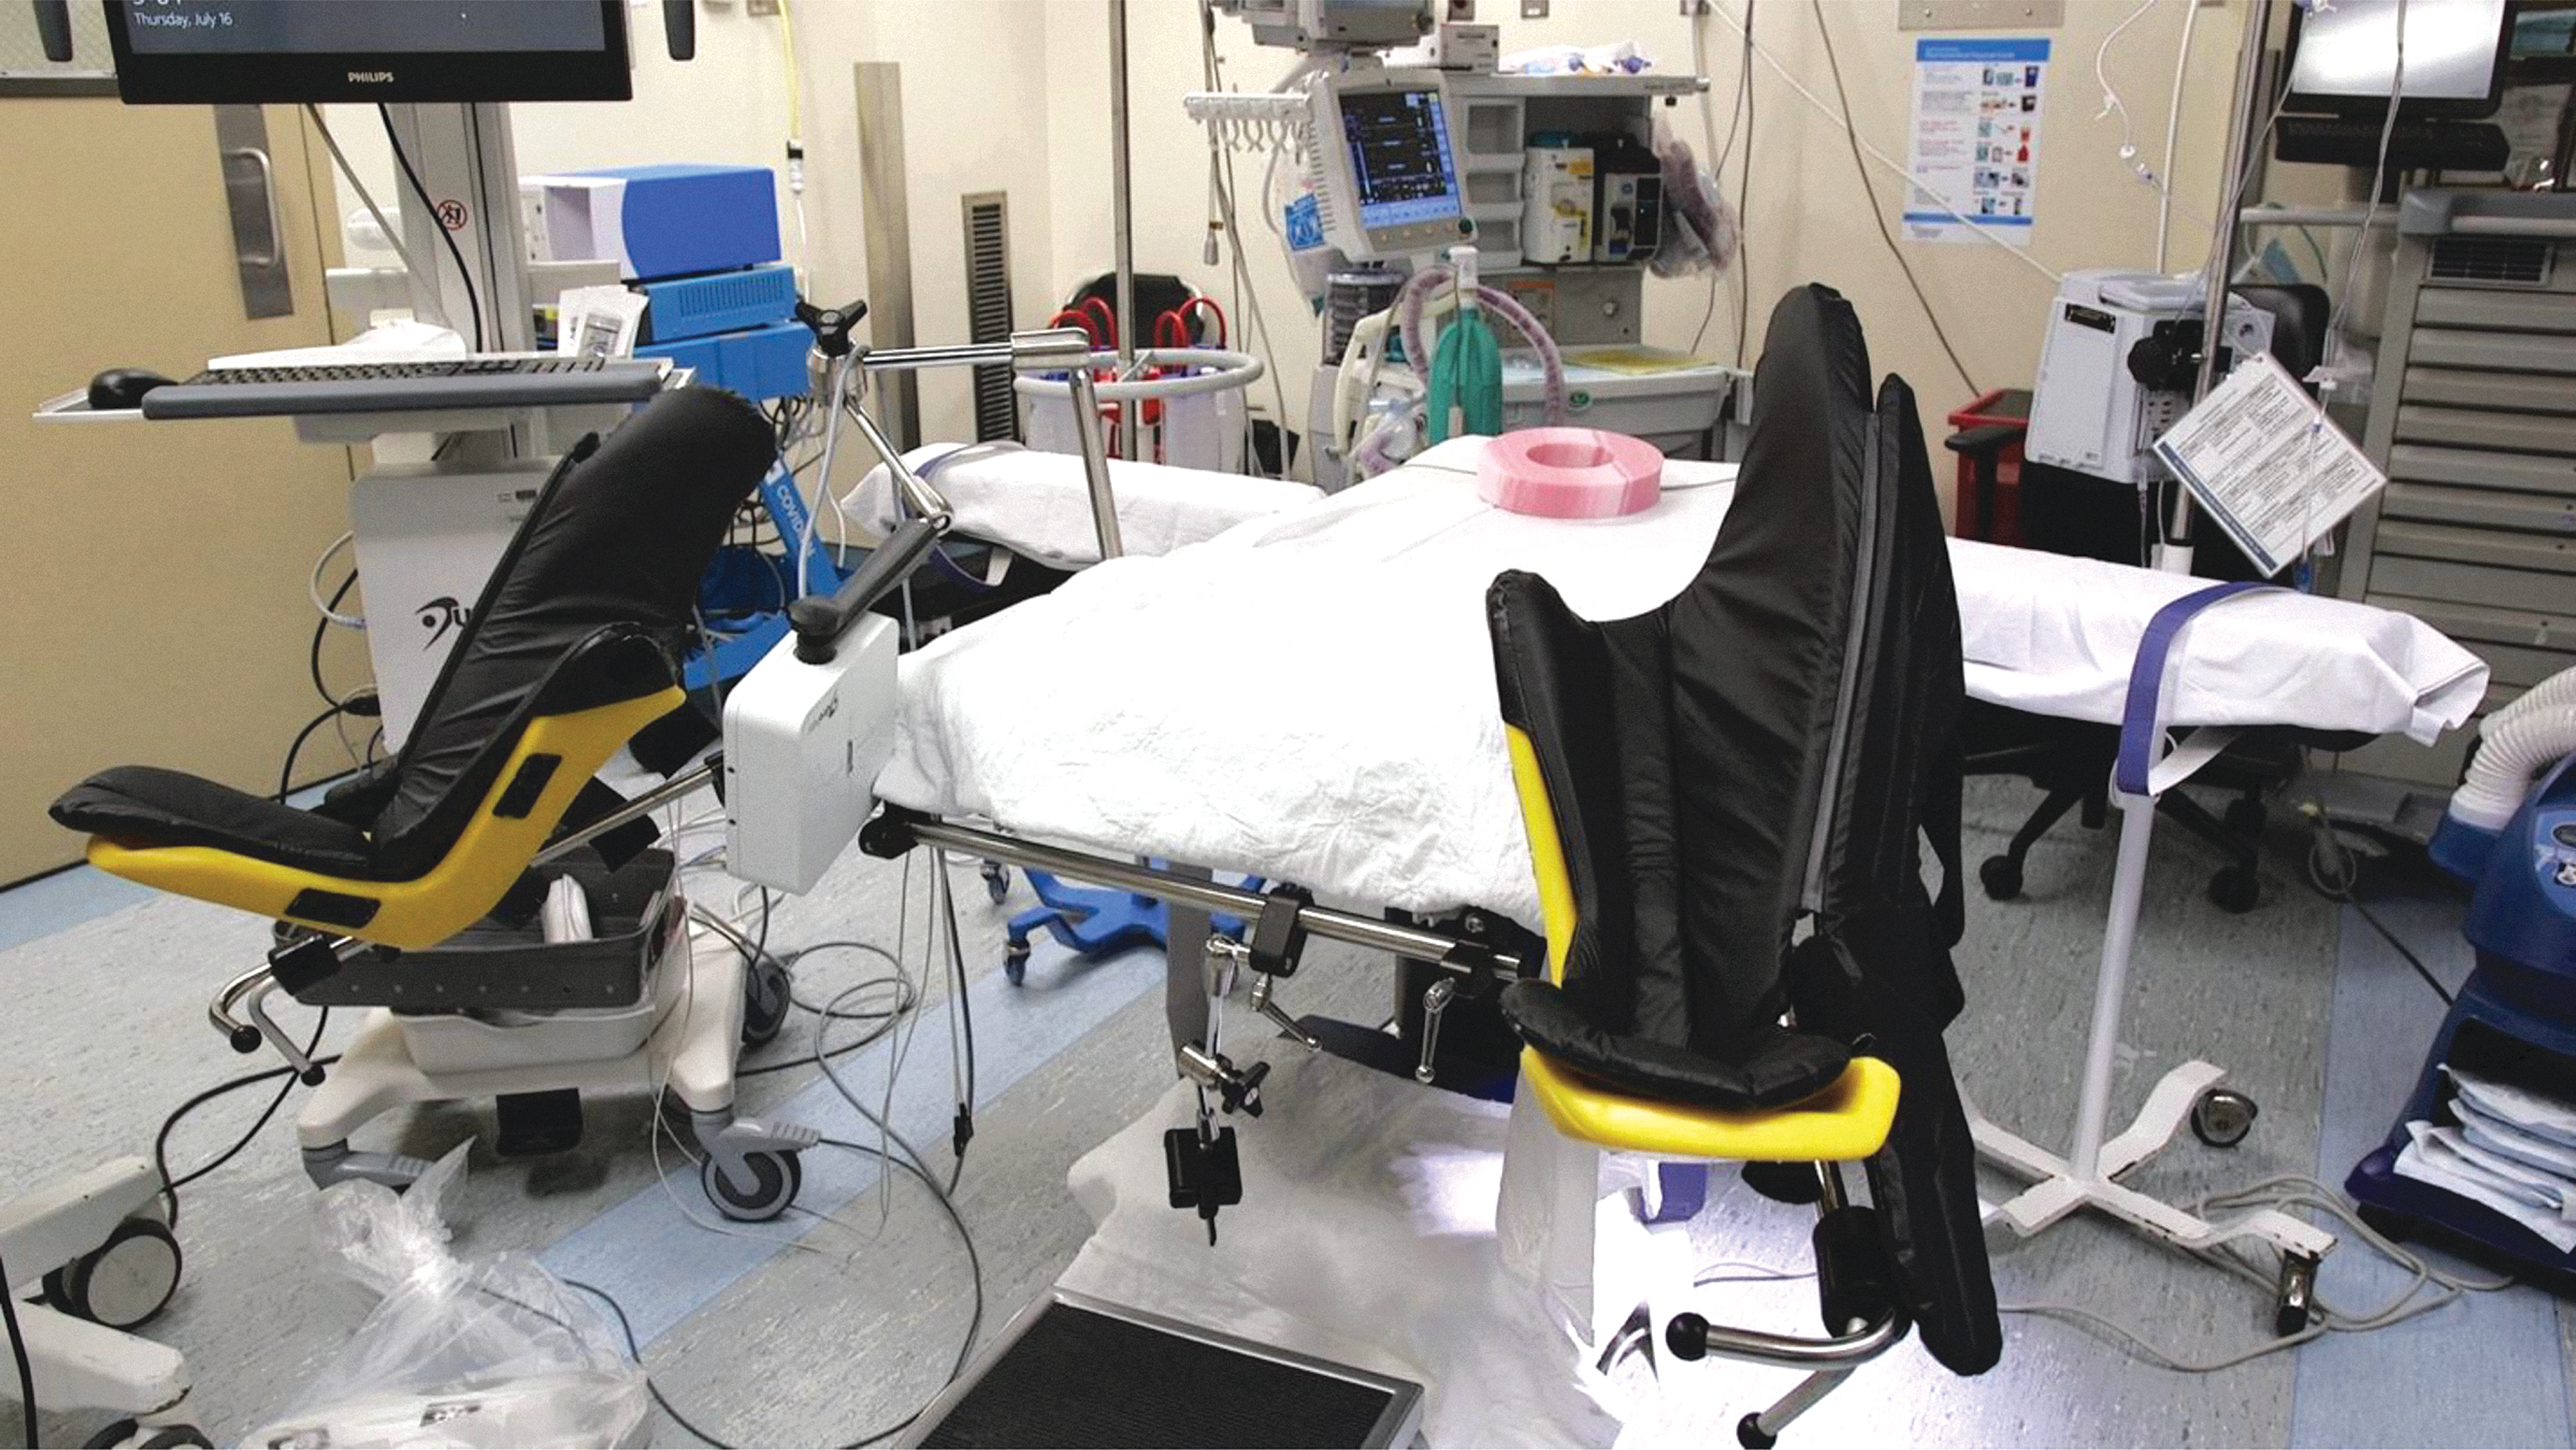
The genitourinary (GU) bed is used with the Allen stirrups. The cross bar is attached in place of the bottom attachment. The cross bar contains the stepper arm, which should be secured in line with the patient's left hip. The field generator of the UroNav system is attached to a Bookwalter post clamp. The field generator is placed cephalad to the Allen stirrups.
The UroNav system is placed near the right Allen stirrup and the ultrasound machine is placed in proximity to the surgeon to aid in real-time prostate observation.
Patient Positioning
The patient should enter the room and sit at the foot of the GU bed. The patient should immediately place his or her legs into the stirrups and lie in the dorsal lithotomy position. The edge of the buttock should be at the edge of the GU bed. A seatbelt should be applied across the patient's abdomen for security. The stirrups should be raised superiorly before sedation to ensure that the patient does not have hip pain. After this hip check is complete, the anesthesiologist can proceed with sedation.
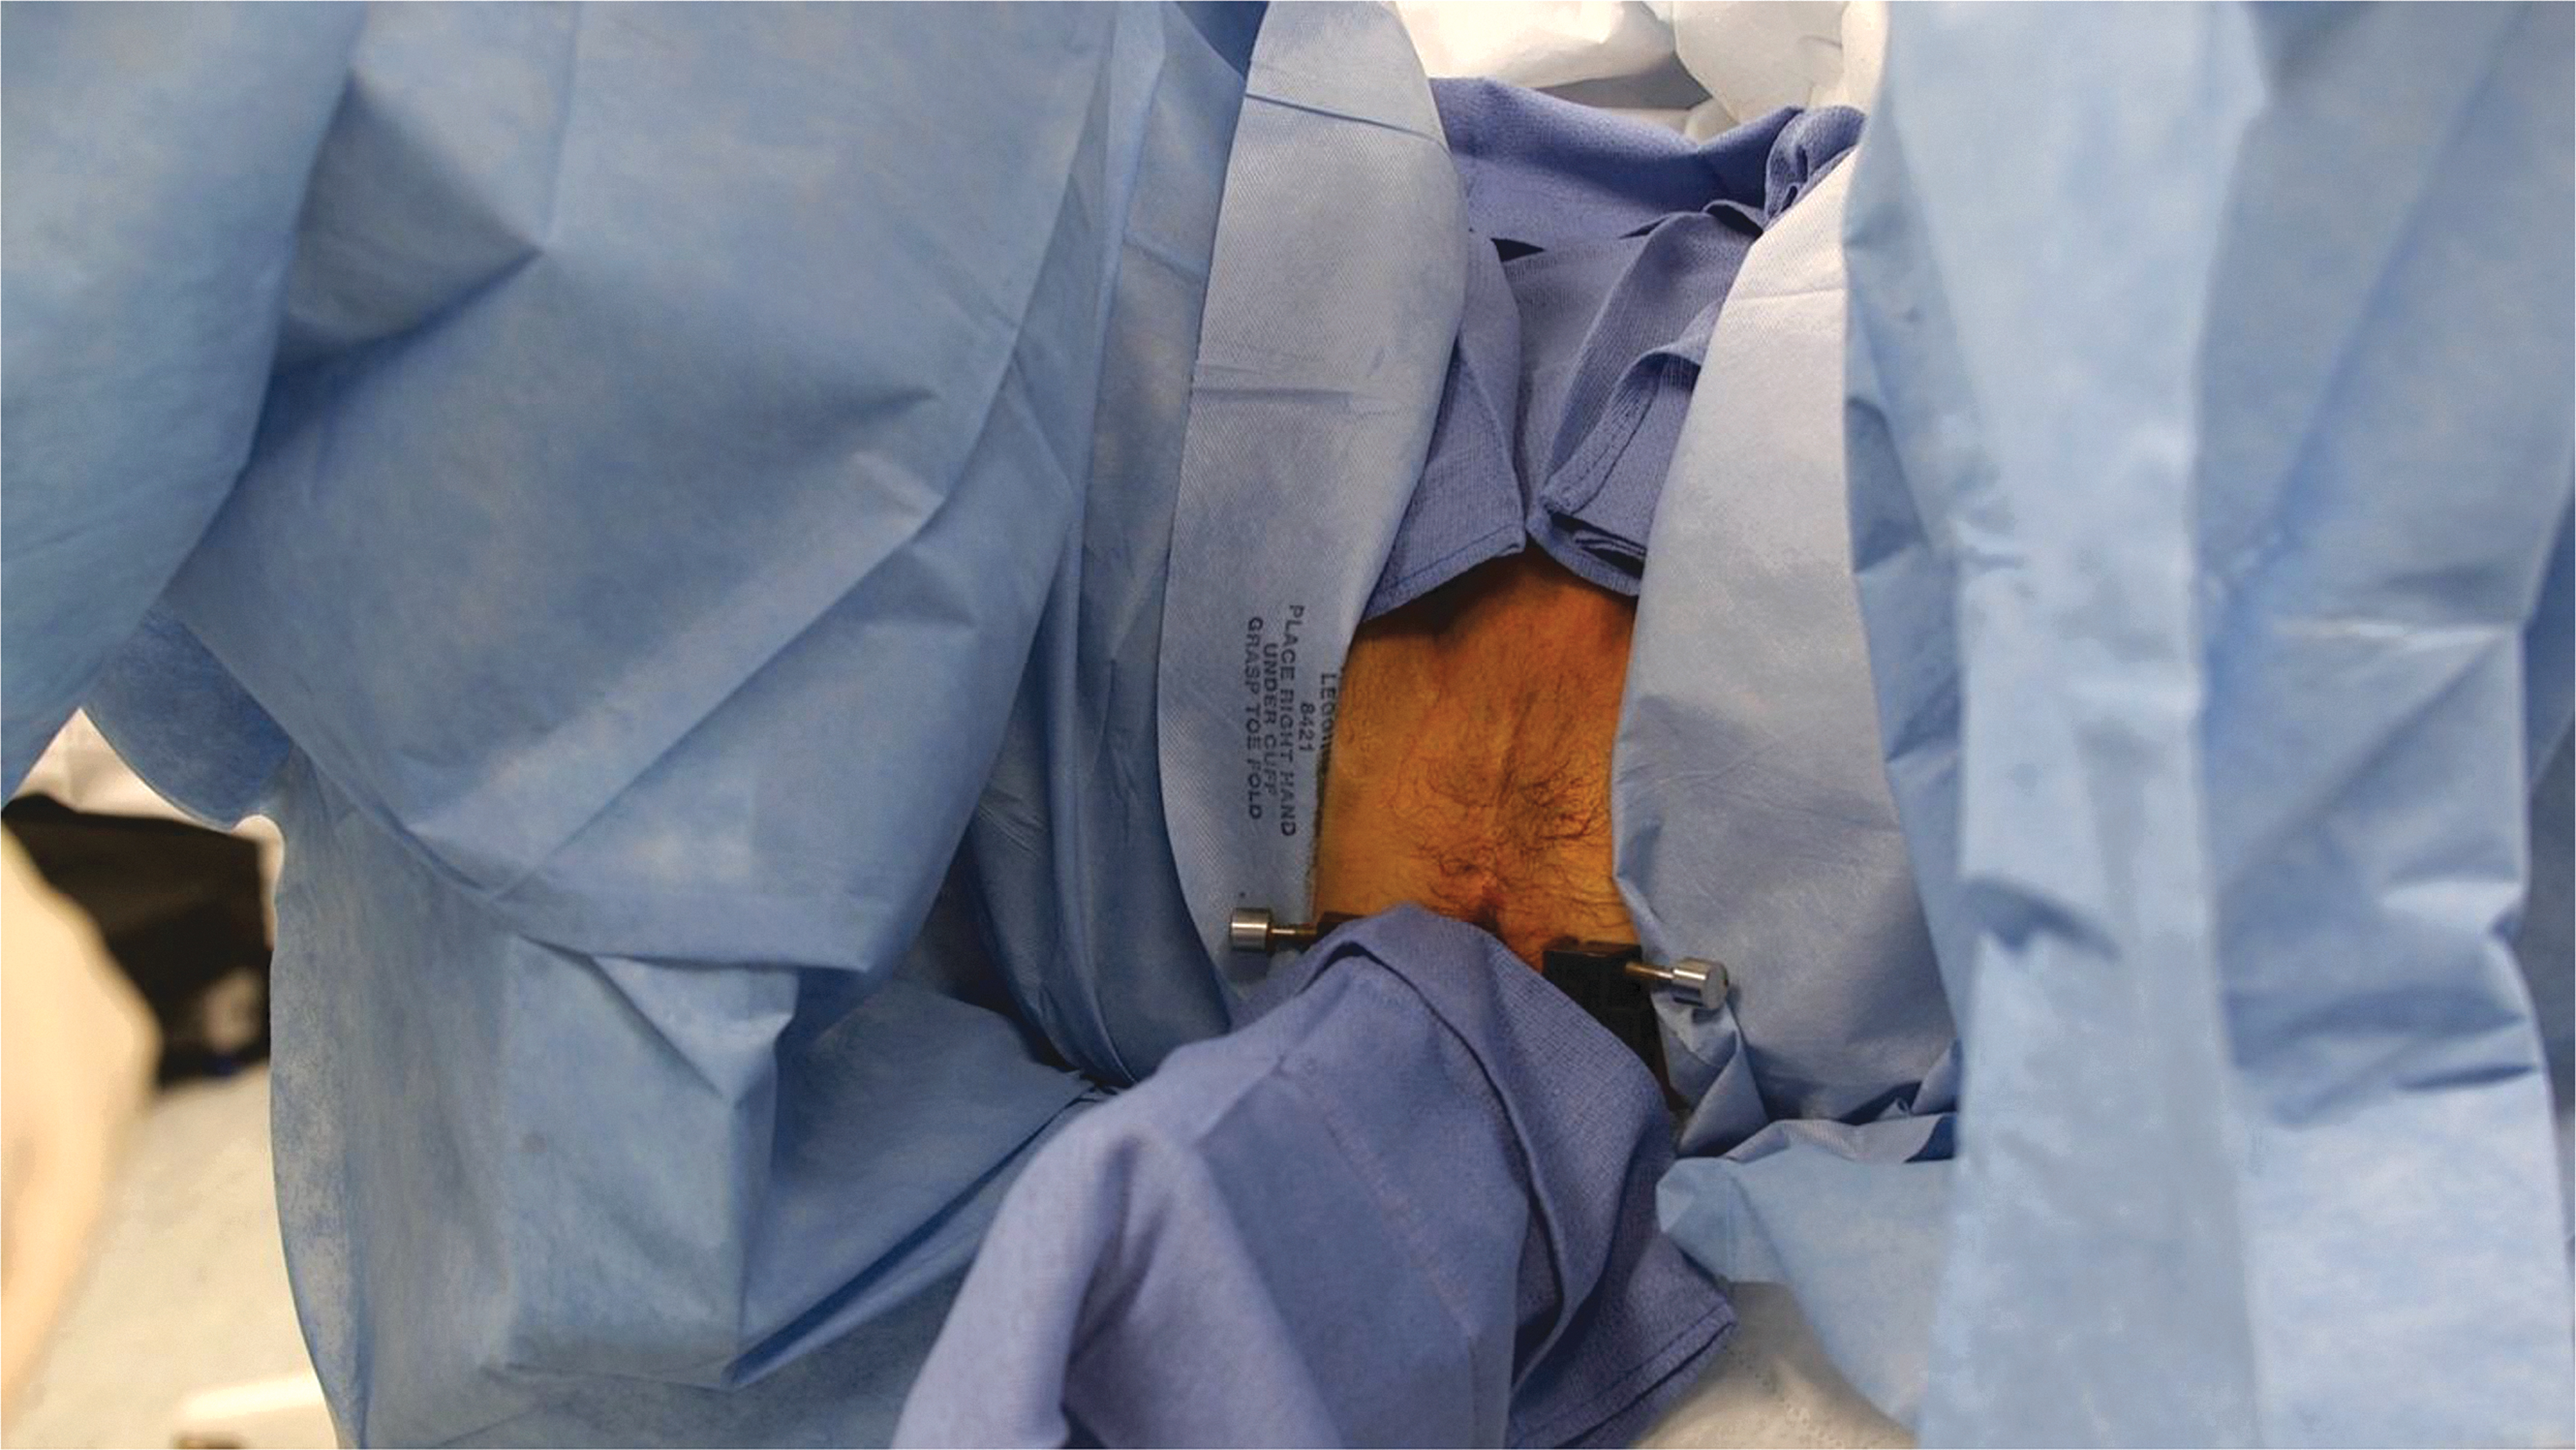
The previously prepared transrectal ultrasound probe and stepper are secured to the stepper holder at the bed. The trackers are loaded onto the sides of the stepper holder. Ultrasound gel from the TUMI syringe is applied to the ultrasound probe tip and inside the rectum. The ultrasound probe is then inserted into the rectum and the stepper arm is tightened once in place. The scrotum is taped up toward the abdomen to expose the perineal skin. Lastly, the patient's legs are raised to move the patient's pelvis before fusion.
The legs are draped with the cystoscopy pack and the suprapubic area is covered with a sterile blue towel. The ultrasound probe is also covered with a sterile blue towel.
Surgical Steps
Local anesthesia administration
Local anesthesia is injected in three locations. First, the perineal subcutaneous tissue is injected with 10 mL of 1% lidocaine. This aspect of the local anesthesia should be performed quickly, since it only provides anesthesia at the needle insertion sites at the skin level. The prostate nerve block is then performed by injecting 5 mL of 1% lidocaine between the prostate capsule and levator muscles. Air should be removed from the syringe before injection to prevent the introduction of air artifact around the prostate. Lidocaine should be observed expanding the distance between these two structures if given in the appropriate space. This is also performed on the contralateral side. The prostate nerve block is finalized by injecting 5 mL of 1% lidocaine between the seminal vesicles and lateral aspect of the prostate. The needle should be observed as it passes between the rectal wall and posterior prostate. Lidocaine should be observed expanding the distance between the seminal vesicles and prostate if given in the appropriate space. This is also performed on the contralateral side. After the administration of local anesthesia is complete, the grid plate is attached to the stepper by securing the grid plate pins.
MRI/ultrasound segmentation
A multiparametric prostate MRI must be segmented and uploaded before the procedure using DynaCAD software. The UroNav system can then access the segmented prostate MRI from DynaCAD and import the magnetic resonance (MR) images for fusion with the live ultrasound images.
Proper prostate segmentation is crucial to ensuring that the live ultrasound image correlates well with the uploaded MR images. This begins with a smooth and uniform speed sweep of the prostate. The borders of the prostate are first selected and then segmentation is performed by properly outlining the prostate edge in the axial and sagittal views. Segmentation should be performed as the prostate is scrolled through in each view. Blending should be performed between the ultrasound and MR images to ensure that the bladder and seminal vesicles align well with the prostate in both images. The prostate can be dragged and rotated to better align the images. The green prostate outline from the ultrasound image should correlate well with the pink prostate outline from the MR image before proceeding.
Surgical steps
Biopsies should first be obtained from Prostate Imaging Reporting and Data System (PIRADS) lesions and regions of interest that were identified and segmented on MRI. The desired biopsy location is selected on the UroNav system and observed in real time on the ultrasound machine. The biopsy gun is inserted through the selected grid plate hole and fired once the location is satisfactory. The biopsy specimen is placed into the specimen container, and the biopsy gun is dipped in betadine and rinsed with sterile water. A total of four specimens are obtained from each lesion, whereas only one specimen is obtained from each systematic biopsy.
Once all biopsies are obtained, the grid plate is first removed by unscrewing the pins. The biopsy probe is removed from the patient by loosening the stepper holder. The tracker clips are removed and hung alongside the Allen stirrups. The biopsy probe and stepper are removed from the holder and immediately cleaned. Cleaning and sterilization of the ultrasound probe is often the rate limiting step to performing biopsies, since surgical centers often do not own more than a few probes.
Postoperative Care
Manual pressure is held at the perineum to aid in hemostasis immediately after the transrectal probe is removed. The perineal wound is covered with bacitracin, Telfa, and tegaderm. The patients have a voiding requirement in the Post-Anesthesia Care Unit (PACU) and are not discharged with any prescription medications. Patients are instructed to keep their wound covered and to change the dressing as necessary with bacitracin and gauze. Home antiplatelet and anticoagulation can be restarted once urine is clear yellow.
Troubleshooting
Patient positioning and prostate observation
The median raphe should be in line with the biopsy probe and the biopsy probe should be pointed downward to follow the trajectory of the rectum. The perineum should also be parallel and flush with the edge of the bed and cross bar.
Air at any interface produces artifact that prevents adequate observation. To remove air between the probe cover and the rectal wall, the probe can be quickly wiggled in a lateral direction. The probe should then be relaxed off of the prostate to allow the prostate to expand into its native position and form. Enough pressure should remain between the ultrasound probe and rectal wall interface to provide sharp observation of the hypoechoic areas within the prostate. This enhanced observation can be achieved by slight inflation of the rectal balloon with water from the Luer lock syringe.
Obtaining the desired target
The target should first be observed on the transverse images, with complete observation of the area surrounding the target on the ultrasound screen to identify the most hypoechoic areas suspicious for malignancy. The details of these hypoechoic lesions are best observed on the larger ultrasound machine screen, and can be obscured by the cartoon on the UroNav screen. The segmented prostate outline should then be moved and rotated to align with the prostate edge that is in proximity to the target lesion. Once the edge has been appropriately adjusted in the transverse view, this should be repeated in the sagittal view.
The stepper holder fins can be moved on either side to alter the holes of the grid plate. We recommend observing the desired lesion on the ultrasound machine, and then moving the fins to align the grid plate hole with the current view.
The biopsy gun bevel can also be used to change the direction of the biopsy, since the biopsy follows the direction of the bevel. At the skin, the bevel should be down, and then rotated upward for posterior lesions to avoid the rectal wall, and rotated medially for lateral lesions.
The top of the grid plate can be pushed toward the patient to assist in bevel down, and pulled away from the patient to assist in bevel up.
Anterior prostate lesions may be difficult to access because of the location of the pubic bone. The patient's legs can be further raised to move the pubic bone away from the prostate. The downward angle of the ultrasound probe can also be lowered to change the trajectory of the biopsies.
Attention must be given to the behavior of the biopsy needle as it passes through the perineal subcutaneous tissue and approaches the prostate lesion. The needle should be observed on the larger ultrasound machine screen as needle beveling and grid plate adjustments are made in reaction to the needle's behavior. These real-time adjustments should precisely place the needle in the desired location. Obtaining precise biopsies from the hypoechoic areas within the target lesion observed on the ultrasound screen is more important than hitting the UroNav cartoon, since the cartoon is the estimated middle of the segmented target calculated by the UroNav system.
List of Instruments
UroNav system with field generator, trackers, and cross bar
Bookwalter post clamp
Allen stirrups
GU bed
Transrectal ultrasound probe
Transrectal ultrasound probe cover
Luer lock syringe
Sterile water
Ultrasound gel
Stepper
Stepper holder
Grid plate
Sterile gloves
Sterile blue towels
Biopsy gun
One percent lidocaine
Twenty-five gauge needle
Eighteen gauge spinal or 25 gauge Chiba needle
Betadine
Telfa
Tegaderm
Bacitracin
Silk tape
Intraoperative photos:
MRI fusion transperineal prostate biopsy operating room setup.
MRI fusion transperineal prostate biopsy surgical field.
Prostate segmentation on the UroNav system in green with the prostate segmentation imported from DynaCAD in pink.

N/A = not applicable; TRUS = transrectal ultrasound; GG1 = Grade Group 1.
Clinical Outcomes
Although there are no randomized controlled trials that utilize the MRI fusion transperineal prostate biopsy technique, we have included a table summarizing the landmark studies that highlight the importance of biopsies from MRI visible lesions.
Footnotes
Patient Consent Statement
The author(s) have received and archived patient consent for video recording/publication in advance of video recording of procedure.
Recommended Videos from Videourology
1. Videourology 2019 Vol. 33, No. 2.
Transperineal Fusion MR/Ultrasound Prostate Biopsy in the Patient with No Anus.
Lauren E. Corona, Robert S. Wang, Matthew Davenport, Nicole Curci, Ardeshir R. Rastinehad, Christof Kastner, and Arvin K. George.
2. Videourology 2014 Vol. 28, No. 5.
Magnetic Resonance Imaging/Transrectal Ultrasound Fusion-Guided Biopsy of the Prostate to Detect High-Grade Cancer Jennifer K. Logan, Andrew Gomella, Soroush Rais-Bahrami, Baris Turkbey, Peter L. Choyke, Bradford J. Wood, and Peter A. Pinto.
Author Disclosure Statement
No competing financial interests exist.
Funding Information
No funding was received for this article.