




Abstract
The Thunkable online platform is an easy-to-use resource for creating apps for mobile devices. Computational thinking is at the heart of problem solving in computer science, and research suggests students’ computational thinking improves when they use simple block coding systems similar to the format used for Thunkable.
“Gifted students are often attracted to coding because it provides them with an opportunity to engage the mental processes of abstraction, decomposition, algorithmic thinking, evaluation, and generalization.”
Policy makers at the state and national level are demanding K-12 schools provide students with computer science exposure. This often involves experiences focused on coding. This movement recently touched gifted education in a significant way. An emphasis on STEM education, with a particular focus on computer science, was a key priority of the recent 2019 Jacob K. Javits Gifted and Talented Students Education Program grant competition, the only federal funding for gifted education. Research over the next 5 years will focus on the role of computer science as part of gifted education identification and services.
Computational thinking is at the heart of problem solving in computer science and has broader applications both in and out of school (Grove & Pea, 2013; Wing, 2006). The term computational thinking is not new. It began with Seymour Papert, a pioneer in artificial intelligence and constructivist education, in 1980, but lost favor until the debate about its importance resurfaced again in 2006 (Marcelino, Pessoa, Vieira, Salvador, & Mendes, 2018). Computational thinking is often linked with general mental ability. The fluid intelligence and visual processing components of the Cattell–Horn–Carroll model of intelligence are aligned with computational thinking (Román-González, Pérez-González, & Jiménez-Fernández, 2017). Specifically, computational thinking is associated with spatial ability, reasoning ability, and problem-solving ability. The mental processes of computational thinking involve abstraction, decomposition, algorithmic thinking, evaluation, and generalization (Selby & Woollard, 2013)—processes in which most gifted and talented students excel. They are also the progressions executed during the coding process.
“Learning to code teaches students how to problem solve, sequence tasks, and express their ideas in creative ways” (Siegle, 2017). Just as Pulitzer Prize winning author David McCullough noted, “Writing is thinking. To write well is to think clearly” (Goodreads, n.d.), coding is thinking, and to code well is to think clearly. Pérez-Marín, Hijón-Neira, Bacelo, and Pizarro (2017) demonstrated that teaching elementary students coding using a block-based system increased their computational thinking. The coding process of connecting blocks works well for beginning coders because it requires minimal typing and allows students to connect coding commands in a sequence that executes (Siegle, 2017).
The Internet has a variety of free coding platforms that are available for students of all ages to begin learning and practicing coding. However, students are most motivated when they can immediately observe the results of their efforts with authentic experiences. Thunkable is a free, online platform that students can use to have an authentic, real-time computational thinking experience. Students build their own mobile apps that run on either Android or IOS devices by simply dragging and dropping components of code and connecting them in blocks using the website’s platform. They can then live test their apps on their mobile devices during development. The ubiquity of mobile devices increases the ease of creating apps with Thunkable to develop computational thinking.
The first step in creating apps with Thunkable is to register for a free Thunkable account at http://thunkable.com. The free account does have some restrictions. Projects that are created with free accounts are public. Other Thunkable members can view and copy the app code associated with a free account. However, one advantage of this is that students can view projects created by others, analyze how others organized their components, and modify others’ code to fit their own needs.
To set up the capacity to test the code students create on the web-based platform, they link their mobile device to their account. The Thunkable website has simple instructions for making the link. It involves downloading the Thunkable Live app from the Play (Android) or App (Apple) store. Once the Thunkable app is installed and linked, students create the app using blocks of code on the Thunkable web platform on a computer. Then they can test the code through an app on their mobile device. At any time during the creative process of blocking code, they can execute the code on the mobile device linked with the account. As changes are made online using the Thunkable platform, the changes are reflected in the linked app running on the mobile device.
The Thunkable site has links to tutorials that teach students how to create apps. These tutorials offer step-by-step instructions for creating a wide range of apps. The sophistication of the apps students create is limited only by their creativity and perseverance using the Thunkable platform. For example, Thunkable is capable of creating an app to translate words from one language to another, to use text-to-speech to talk, or to use a mobile device’s camera to recognize objects. Students can create apps that use any of their mobile device’s special features, such as the camera, microphone, gyroscope, accelerometer, and timer.
For a demonstration of the process, what follows is an outline of the steps to create a simple app that features four buttons, each labeled with the name of a different color. After registering for an account, students begin developing an app project by clicking on the Create New App box (see Figure 1) at http://thunkable.com (or “Start Building” the first time they try it) and naming their project (see Figure 2). (Note: Because they are using the free version, they cannot change the Public setting to Private.) A design screen will open that features tutorial options on the far left and three sections used to develop the app: a list of components to use to build the app, a view of the app screen, and the default attributes of the item on the app the student is currently designing, which initially is the opening app screen (see Figure 3).
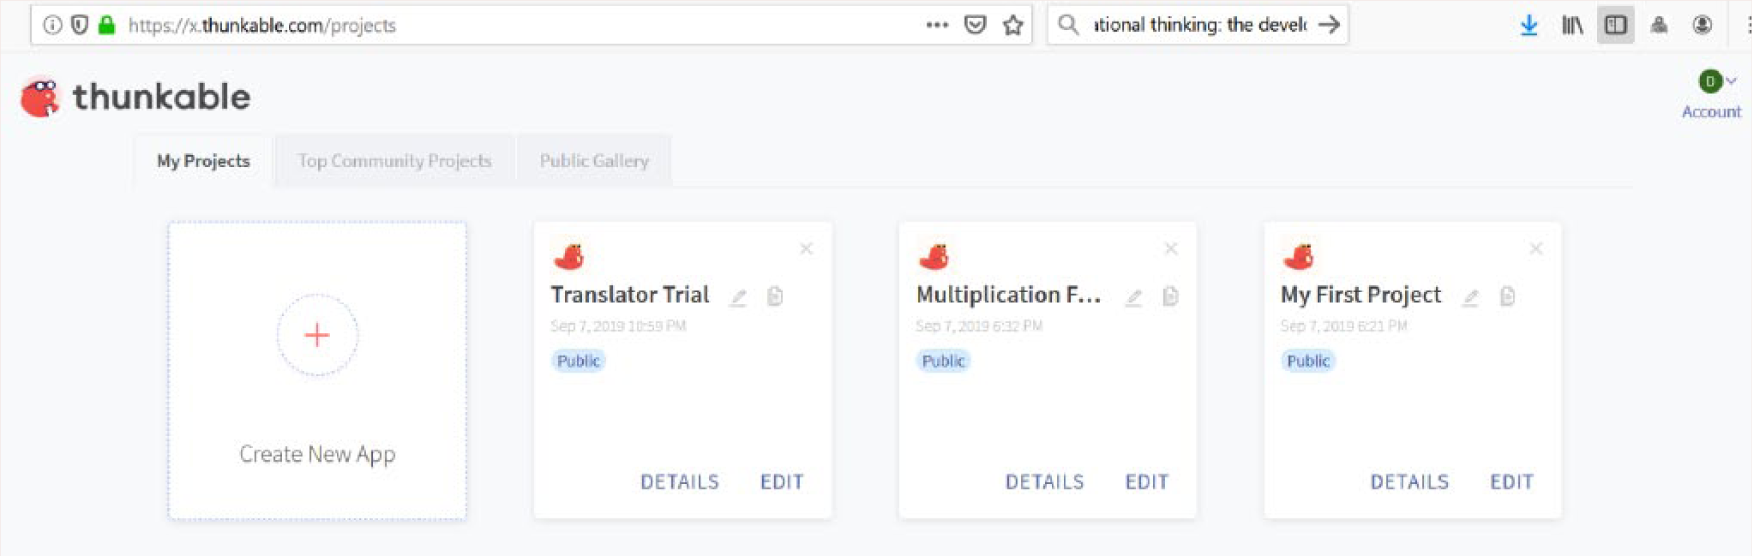
My Projects tab.

Create New Project screen.
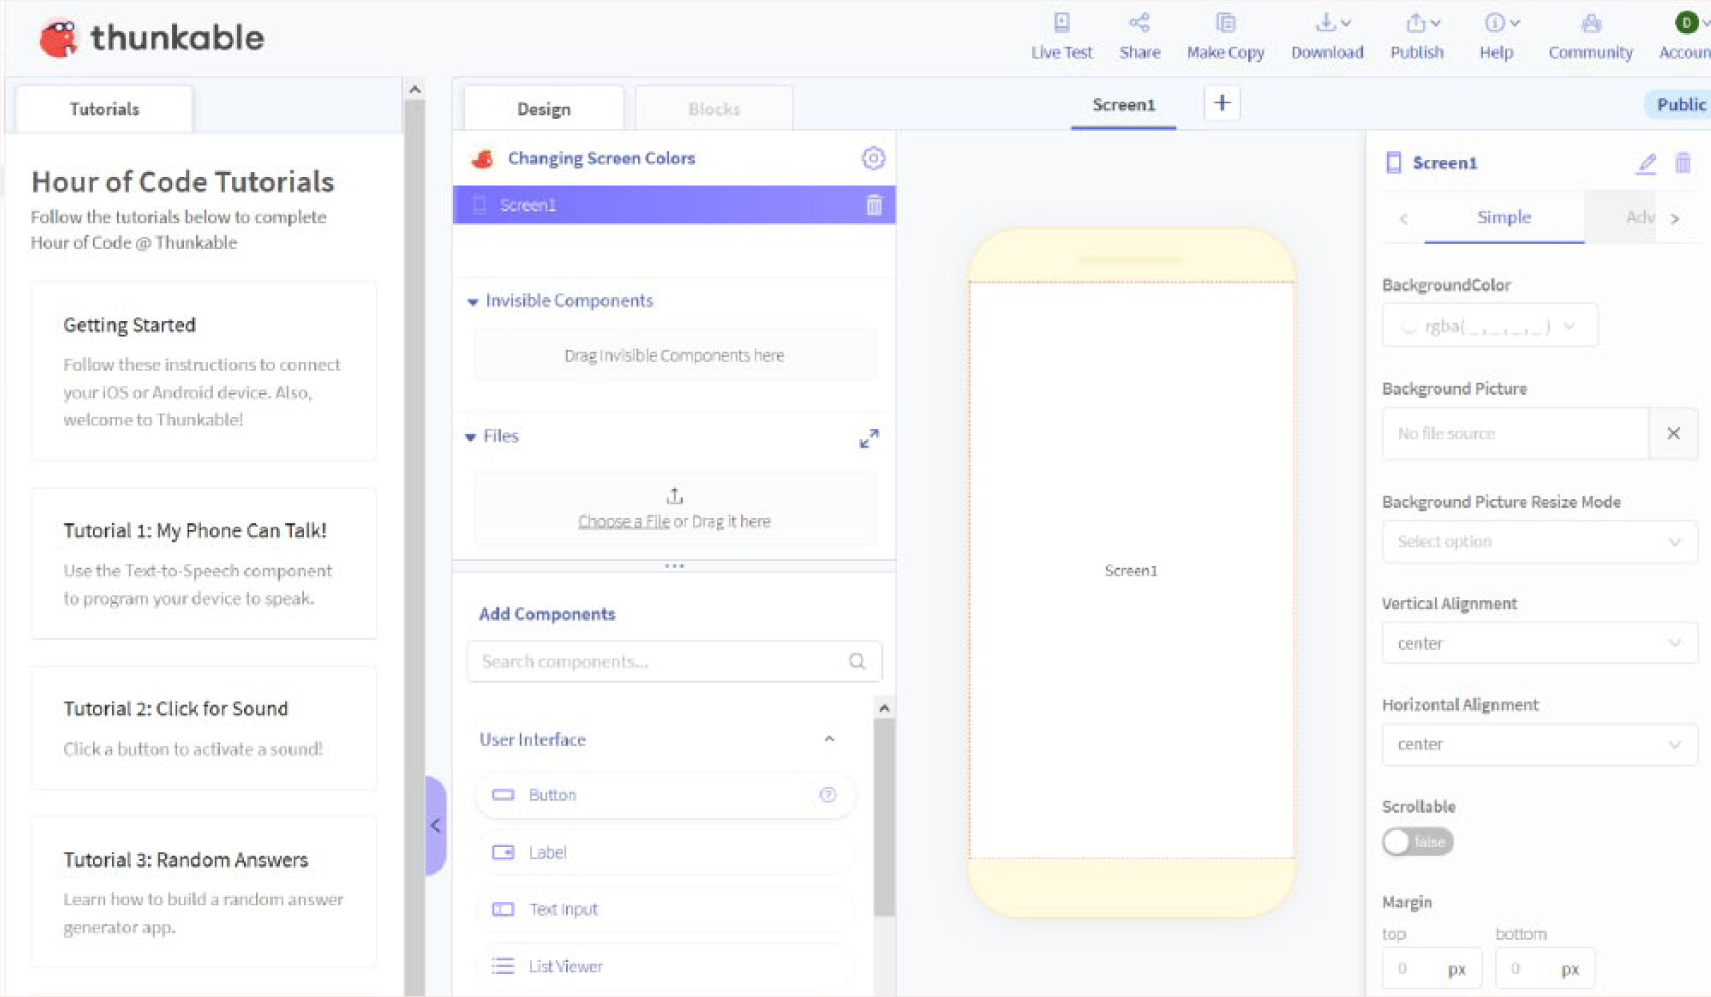
Tutorial and Design screen sections.
Again, for this project we will create a simple app that features four buttons, each labeled with the name of a different color. When the user presses a button on the app, the background screen will change to that color named on the button. To begin, we add our first button to the screen by clicking and dragging the Button component, which is found under the User Interface list of Add Components (see Figure 4), onto the background screen. We now can change the text on the button to the name of a color by typing Blue in the Text dialogue box on the far right attribute menu for the button component. We could also change several other attributes for our button by using the other dialogue boxes on the right side of the screen. For example, we can set the background color of the button by default to white and the text color of the button to blue. We can set the font size to 24 point.
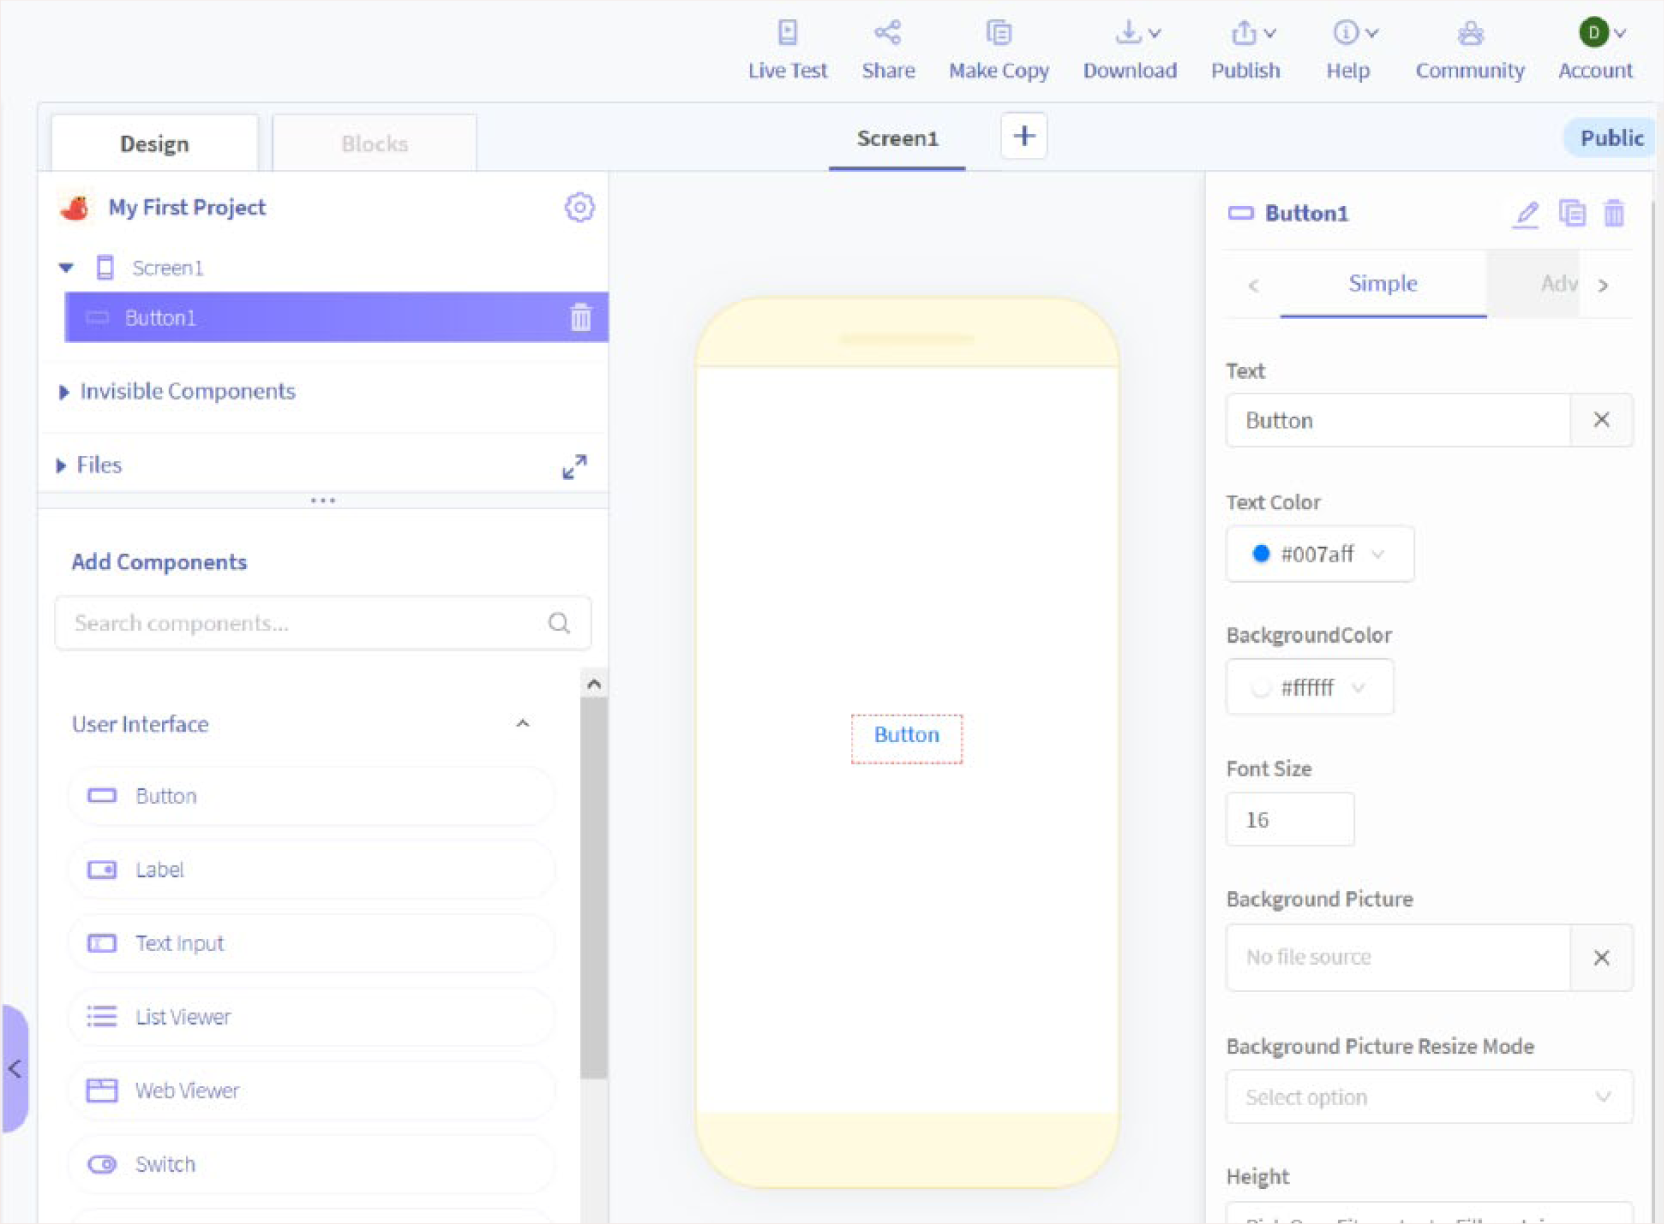
Setting components’ default attributes.
Because we want an app with four buttons, we repeat the process of clicking and dragging buttons from the Add Component list onto the screen and changing the default attributes for Text, Text Color, Background Color, and Font Size. We might also set other attributes for the button, such as setting Font Bold to true (see Figure 5).
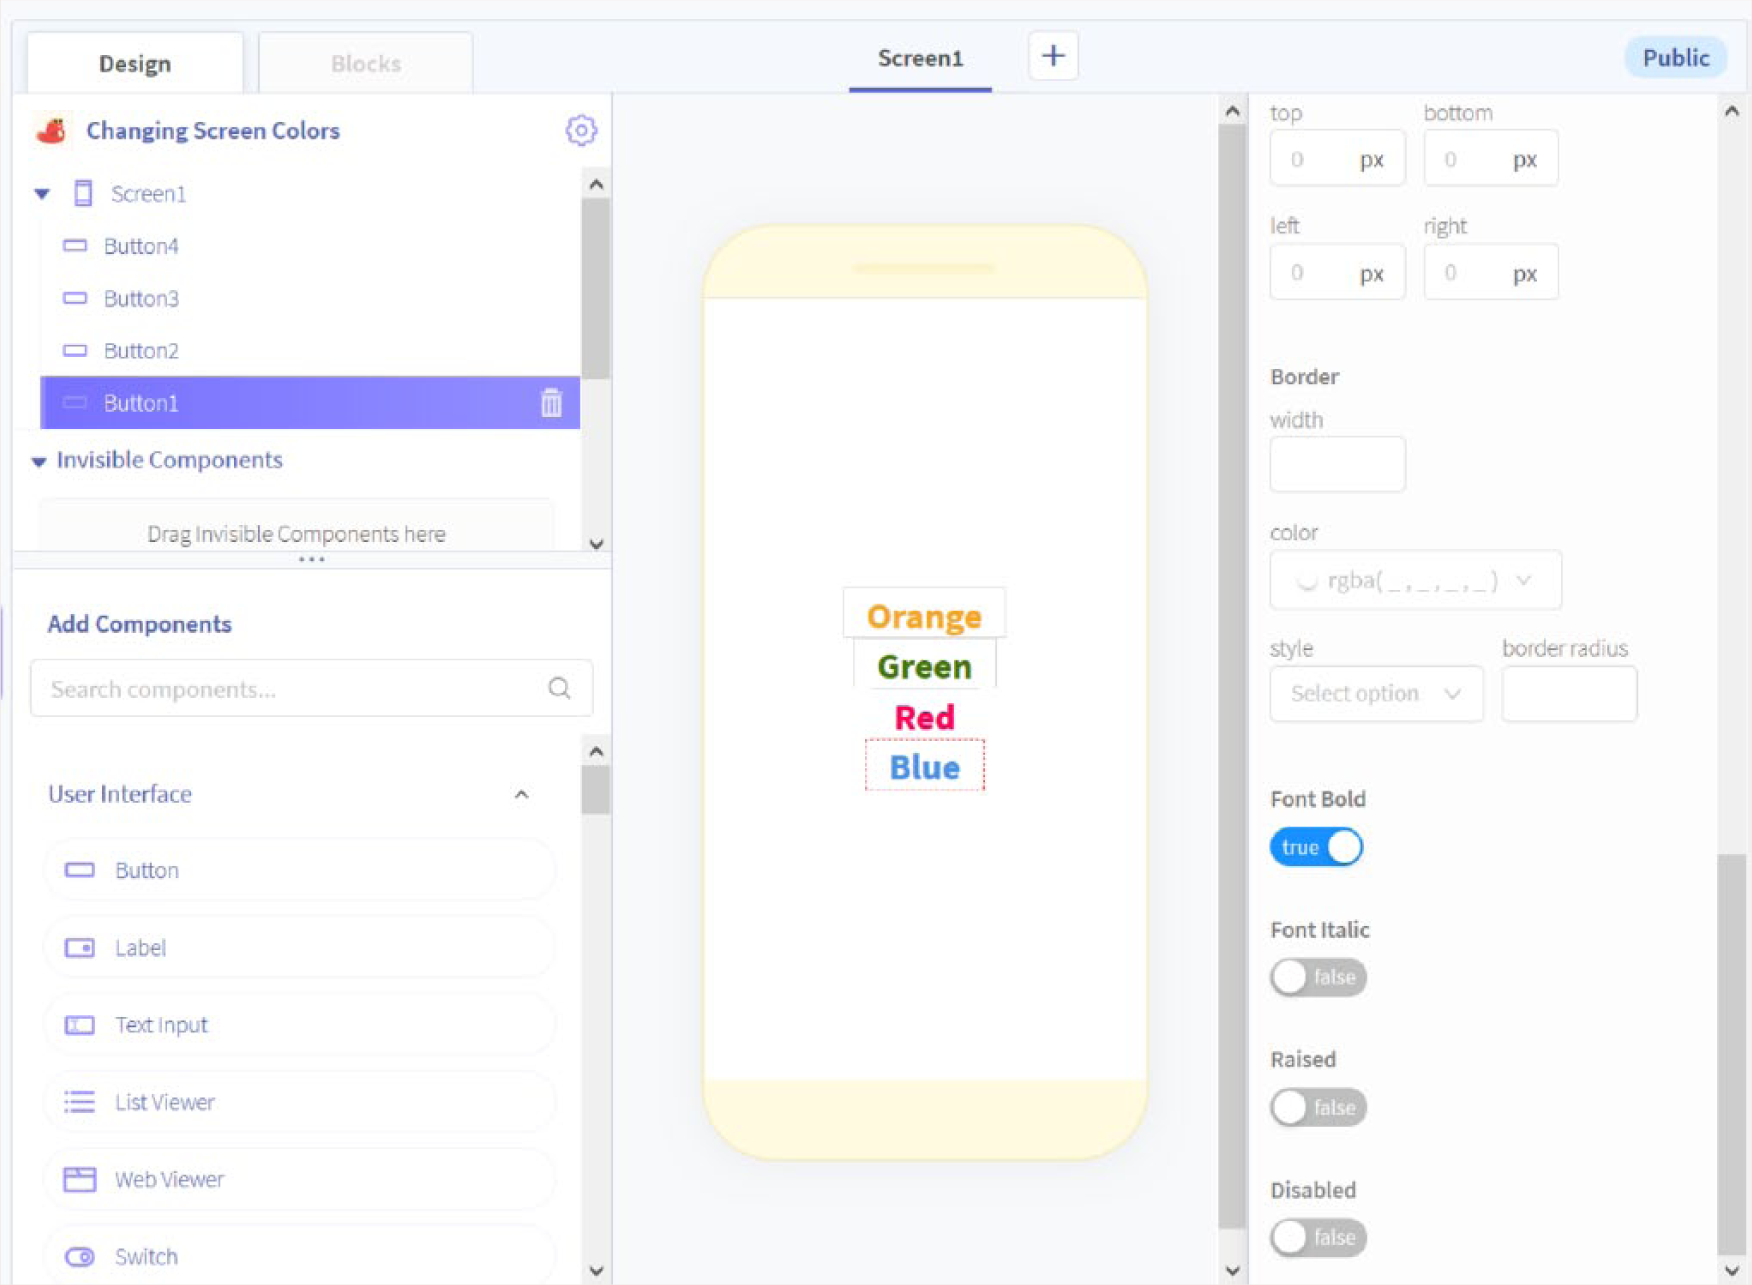
Sections of the Design screen.
We are now ready to set the block code to change the background color when each button is pressed on our app. We click on the Blocks tab (next to the Design tab) near the top of the screen. A different screen will appear. When we are in the Blocks view, we see a list of coding command categories (with color tabs next to them). Below the list of coding categories, we see a list of the items (components) we have on our app (Button4, Button3, Button2, Button1, and Screen1). When we select Button1, a list of possible coding commands (arranged by categories) for Button1 appears (see Figure 6). We will want to select a Control, Logic, and Color command (which we refer to as blocks) from the list. The term “blocks” is used to signify that these times are combined to build the app’s functions. The different types of command blocks have different colors. The Control blocks are orange, the Logic blocks are green, and the Color blocks are gray.

Coding Block options.
We click on the top orange Control block (when Button1 Click do) (see Figure 6). The block appears on our Blocks window. We click on Button1 again and select the fifth green Logic block (from Button1 set Background Color to). In the Blocks view, we drag our green Logic block into the puzzle slot of our orange Control block (see Figure 7). The Command block for Button1 now reads, “when Button1 click do from Button1 set Background Color to __.” Because we want to change the color of the background of the screen, not the button, we need to change the green Logic code from Button1 to Screen1. We do this by clicking on Button1 in the green Logic block and selecting Screen1 from the pull-down menu that appears (see Figure 8). We now select the color we want from the Color option and drag it to the end of the Logic block that reads, “from Screen1 set Background Color to ___” (see Figure 9). We could also click on the white section of the gray Color block at the end of that green Logic block and select blue from the color matrix that will appear.

Changing colors.

Changing component selections.
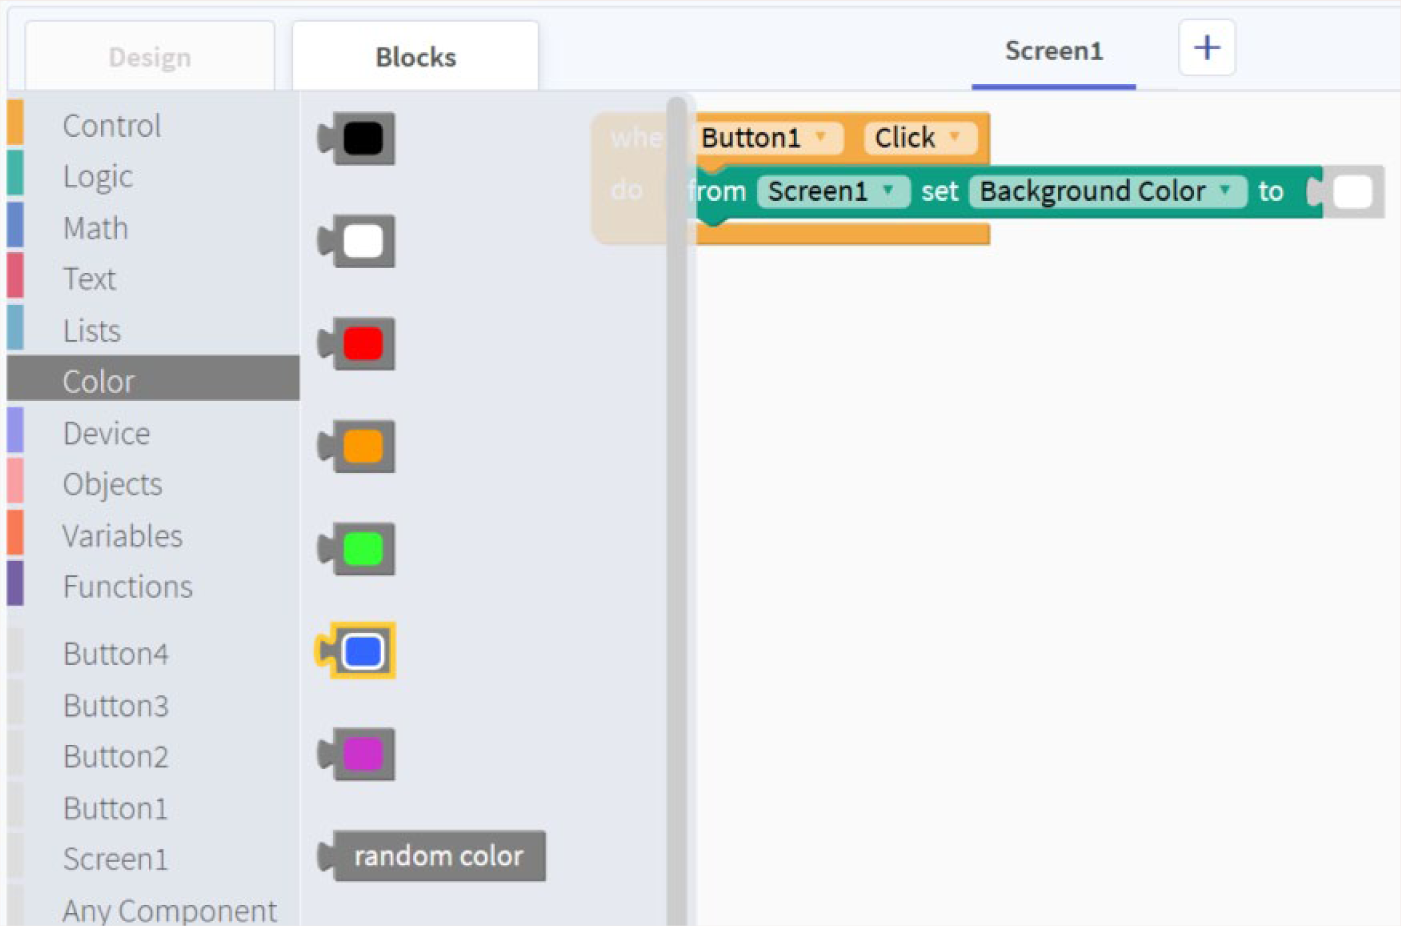
Color options.
We can now test our app by opening the Thunkable app we installed and linked to on our mobile device (see Figure 10). When we click on Button1, which we labeled Blue (see Figure 11), our background screen will change to blue (see Figure 12). At this point, we have only developed Control code for Button1. The other buttons will not change screen color yet.
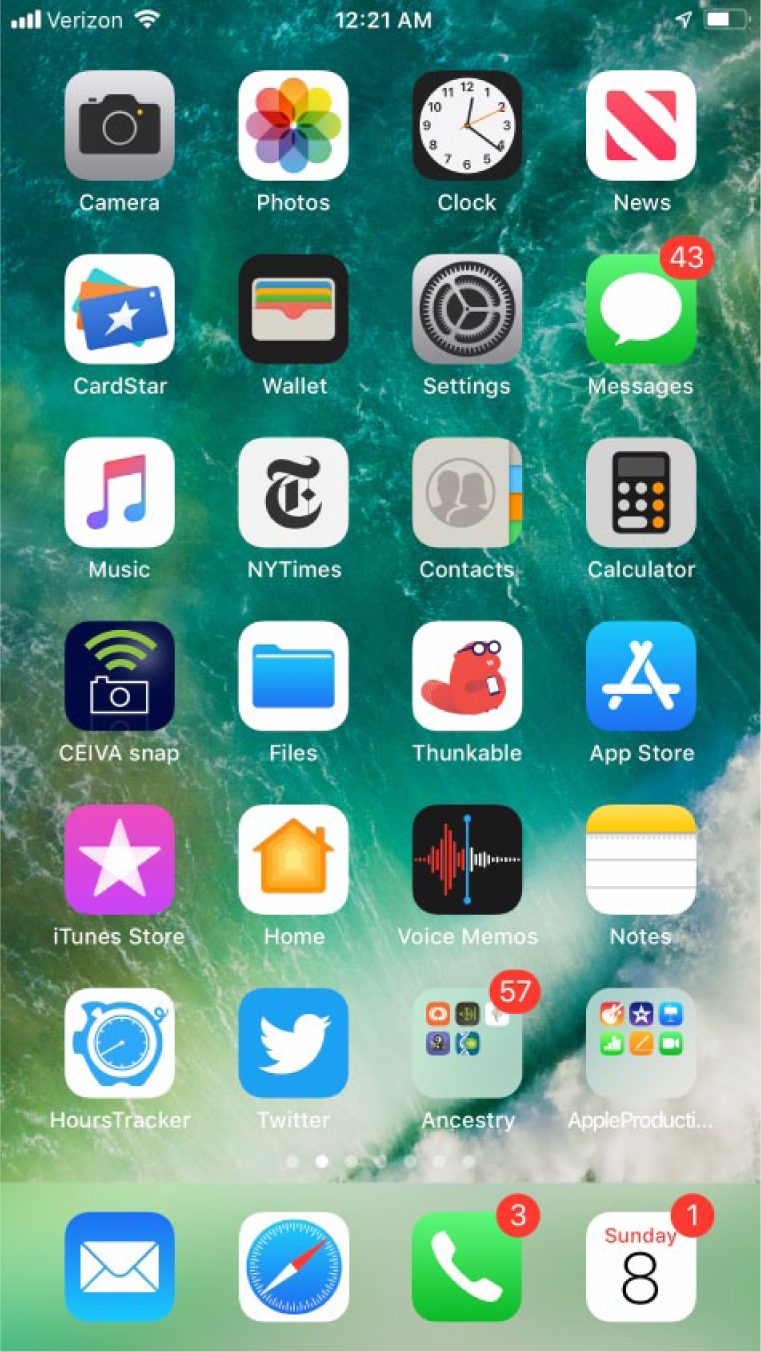
Thunkable app icon.
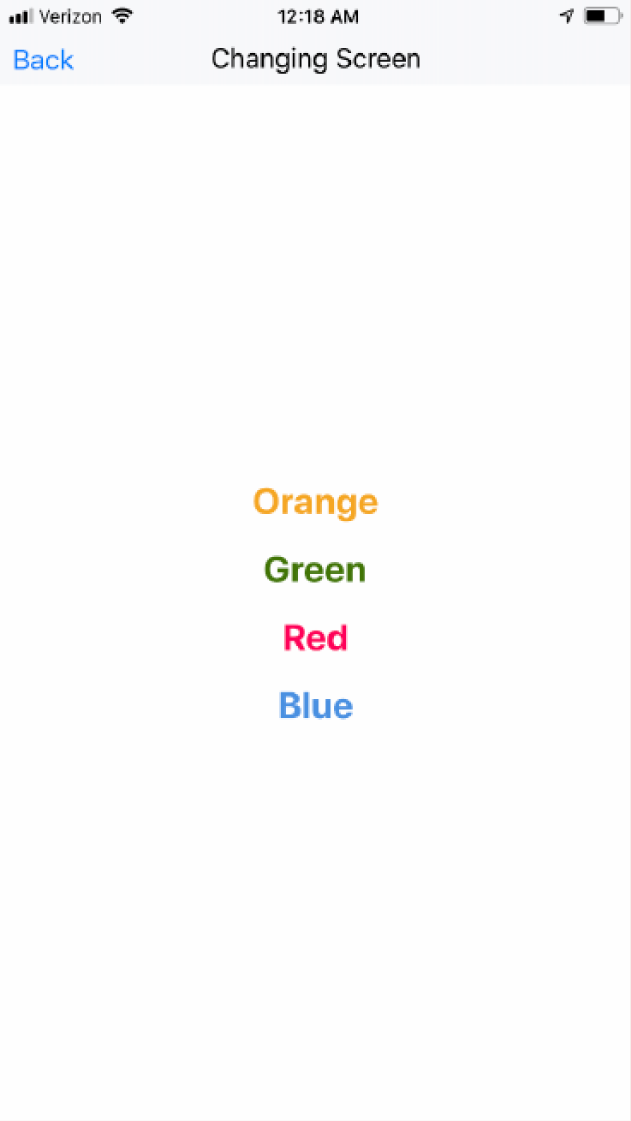
App display screen.
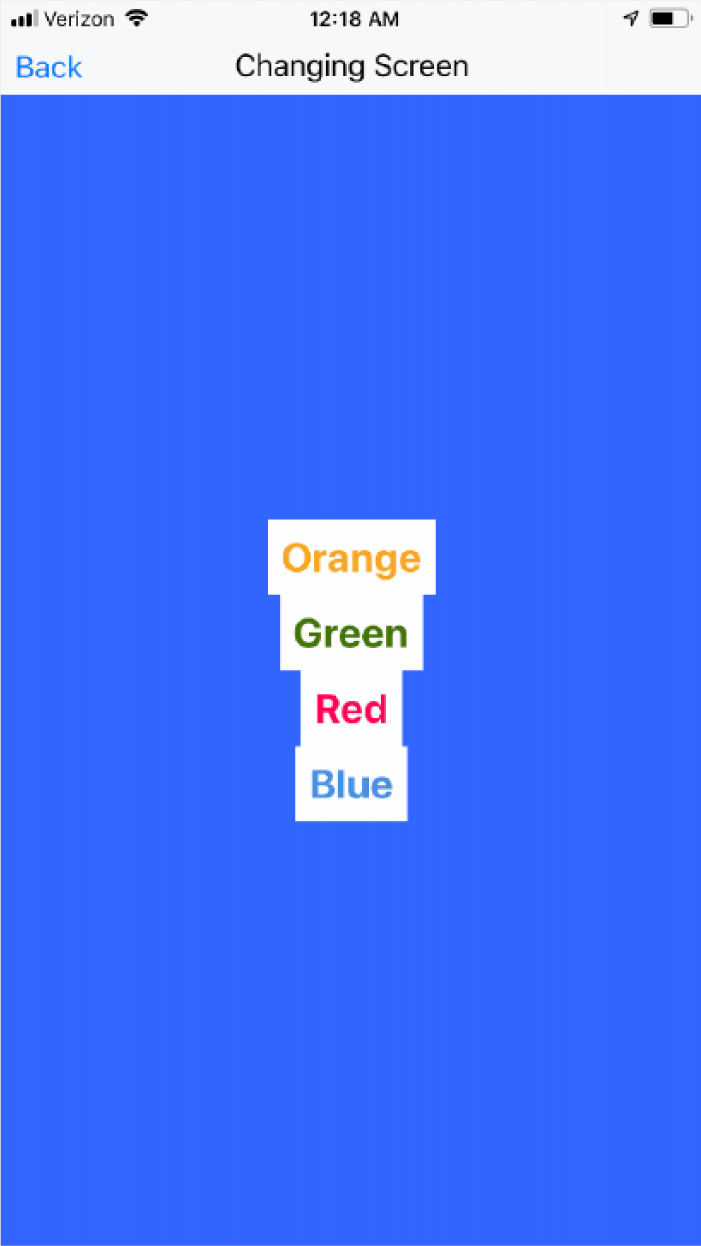
Blue background display.
We must repeat the setting of a Control and Logic block that we just completed for Button1 for Button2, Button3, and Button4. However, we can use the duplicate function to avoid having to repeatedly select Control and Logic blocks. We can right click on the block we made for Button1 and select Duplicate (see Figure 13). On the duplicate block, we change the orange Control block from Button1 to Button2 and replace the blue color with the red color by clicking on the blue block and select red from the color grid (see Figure 14). We repeat the process for Button3 and Button4 (see Figure 15). As we add each component, the app on our device automatically updates the code and we can test our changes.
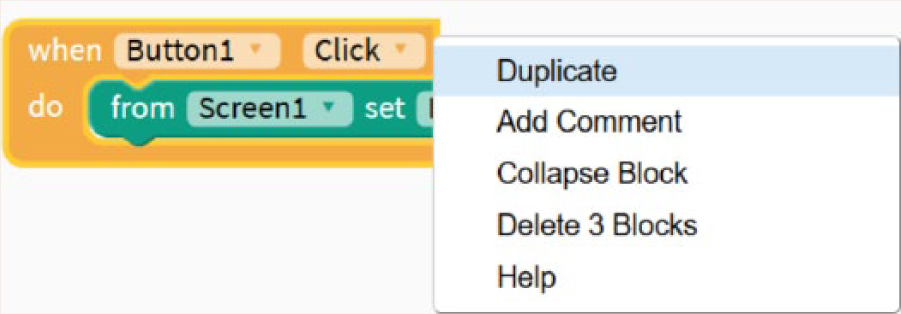
Duplicating Blocks.
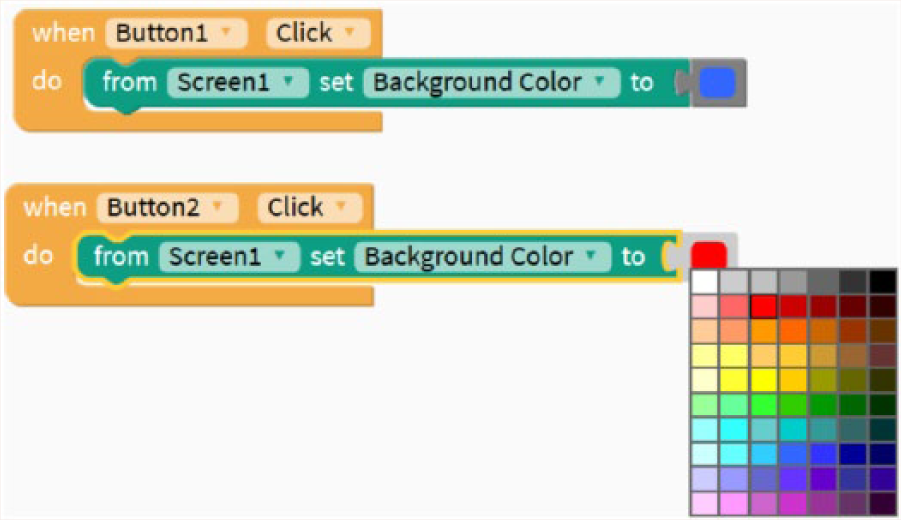
Color grid options.

Completed set of coding Blocks.
Once the app is completed, students can download it (see Figure 16) via email and install it on their mobile device. Of course, enterprising students can submit their apps to the App store for consideration.
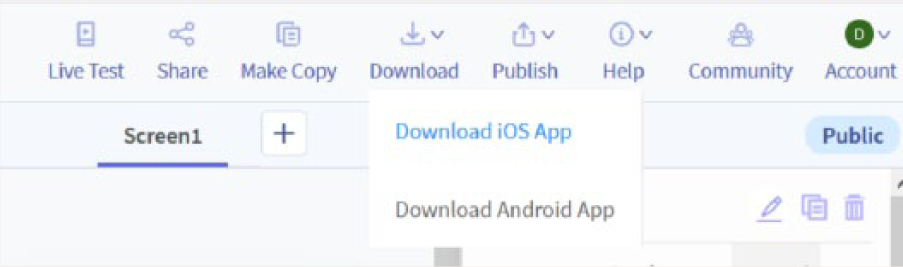
Sharing a finished app.
Gifted students are often attracted to coding because it provides them with an opportunity to engage the mental processes of abstraction, decomposition, algorithmic thinking, evaluation, and generalization that Selby and Woollard (2013) reported were key to computational thinking. Although these skills are essential for coding, they are similarly important for students to function in a changing world that requires their creativity and mental keenness.
Footnotes
Conflict of Interest
The author(s) declared no potential conflicts of interest with respect to the research, authorship, and/or publication of this article.
Funding
The author(s) received no financial support for the research, authorship, and/or publication of this article.

Bio
Del Siegle, PhD, is associate dean for research and faculty affairs in the Neag School of Education at the University of Connecticut and past president of the National Association for Gifted Children. He serves as director of the National Center for Research on Gifted Education and is a professor in gifted and talented education.